To help you find the data that you require, use the Space Console's Location Filter to restrict the data displayed by the Space Console. You can filter on many properties, such as vacancy, capacity, room size, department assignment, floor, room number, and so on.
When you set a filter, you receive data pertaining to the locations that match your search criteria. For example, if you set a restriction for a specific department, the Space Console displays only:
Tip: If you want to search for employees regardless of their room location, you can you the Smart Search console located in the Employees tabs. For information, see Finding Employees and Rooms with Smart Search.
Once you set a location filter, the system updates:
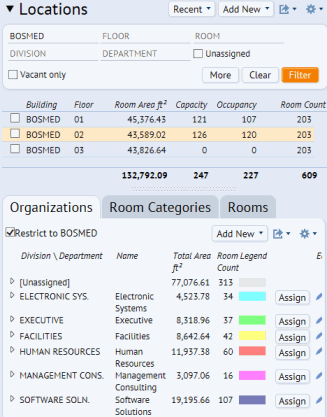
The restriction stays in effect as you switch between Space and Occupancy modes, or between the Space Console's tabs. For example, the image below shows a restriction to the BOSMED building.

The Location Filter includes a More button which expands the filter to display additional options.
Once you set your filter, you may wish to hide the filter panel (which also includes the floor plan list) so that you have more room to display data. To do so, choose the triangle-shaped button above the filter options.
To set a filter:
The below sections outline the behaviors of the Locations Filter. You can experiment with combining several options to restrict data according to your needs.
The Location Filter offers several fields for entering your search criteria, such as Department, Floor, and Employee. Before you set a filter, each field displays its label within the text entry box so you know what information the field holds. Once you complete the field, your selected value replaces the label.
You must complete these fields with one or more existing values. For example, it does not make sense to filter by a department that does not exist in your facility.
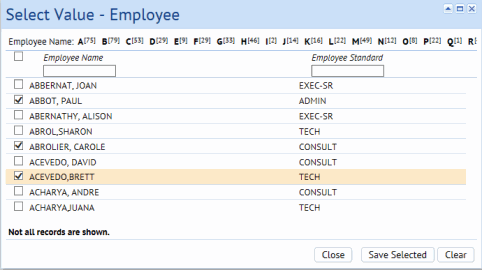
There are a few ways to complete the filter fields:


Suppose you want to clear a value that you entered in the field, but you don't want to clear the entire filter. Follow this procedure:
For complete information on completing Select Value fields, see Completing Select Values Fields (Validated Fields).
Often, you will want to perform a simple query showing vacant rooms. For this reason, "Vacant Only" is included in the main part of the filter. You can access other occupancy settings with the More button. Note that Vacant is included in this additional set of options as well so that you can search for vacant rooms combined with other occupancy settings; if you set Vacant Only, the system automatically completes Vacant under the Occupancy options.
You can locate rooms that are not assigned to divisions or departments, or whose use is not specified (room category/type) by using the Unassigned option of these classifications. For example, when allocating space to your organization, you will want to know the rooms not yet assigned to a division or department. Likewise, you will want to know which rooms are not yet specified for use and do not have a room category or type assigned to them.
Whereas the other options are based on rooms that meet the search criteria, when you use the Room Count or Total Area options you are searching for floors that meet the specified criteria. With these options, the system completes the Floor Plan List with the floors that match the Room Count or Total Area that you enter. Then, the tabs list information for the rooms contained on these floors.
For example, suppose you set a filter for a Room Count greater than 205. The system presents floor BOSMED-02 (which has a room count of 206) in the floor plan list. The Rooms tab lists all rooms for BOSMED-02, and the Room Categories and Organization tabs lists the properties for rooms in BOSMED-02. The Employees tab lists the employees located in rooms in BOSMED-02.
Similarly, suppose you search for floors that have a total area greater than 44,000 feet. The system presents floor BOSMED-01. The Rooms tab lists all rooms for BOSMED-01, and the Room Categories and Organization tabs lists the properties for rooms in BOSMED-01. Similarly, the Employees tab lists the employees located in rooms in BOSMED-01.
Note that the Total Area option refers to the total Room Area of each floor which is displayed as Room Area in the floor plan list; this option does not refer to the Room Area of each room.
You may have recently set a filter and want to use it again. Click the Recent option at the top of the Locations Filter, and you receive a list of previous filters that you have set. Select a filter from this list, and the system completes the filter options with these values and displays the corresponding results.
Continue your exploration of the Space Console with Display Floor Plans and Floor Information and Review Organization, Room Category, Room, and Employee Information (the Space Console's tabs).