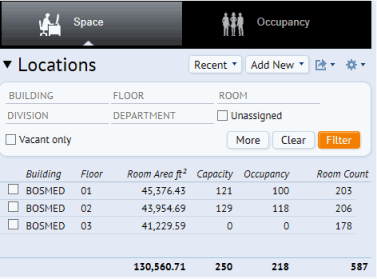
Beneath the filter, the middle section of the Space Console presents a list of floor plans. If you have set a filter, the list will present only those floor plans that have rooms that match your filter setting. For example, if you have set a filter to show vacant rooms, the floor list includes only floor plans that have vacant rooms.
Note that the list includes only floors that have floor plans. If you have created a record of a floor but have not developed a corresponding floor plan drawing, the Space Console will not list this floor.
The list of floors includes basic information about the floors, such as the area and occupancy of each floor. The system totals these values for all floors displayed in the list. As you change the filter, the system updates the list.
If you'd like to change the information displayed for each floor, use the gear icon located at the top of the Space Console to access the Select Fields form.
Click its check box. The floor plan loads in the right area of the screen.
The system automatically highlights the floor plan by division. You can change this highlight, as well as change the labels. For example, the below image shows that the floor plan for Floor 02 in the BOSMED building has been selected in the floor list and loaded. The default Divisions highlight colors each room according to its division assignment.
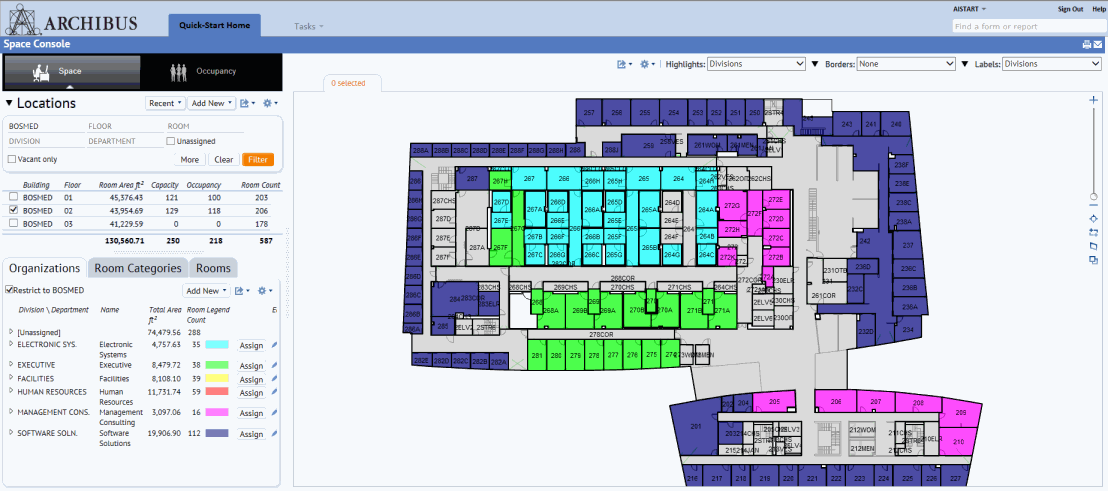
Click their check boxes. The system displays them at an appropriate zoom setting so that all selected floor plans can fit in the area. You may want to display multiple floor plans at once so that you can get an overview of your space. For example, you can set a highlight, such as division assignment, and then see this highlight for all floors at one time.
Review Organization, Room Category, Room, and Employee Information (the Space Console's tabs)
Work with floor plans using these topics: